
Understanding Exposure
Aperture, shutter speed and ISO work together.
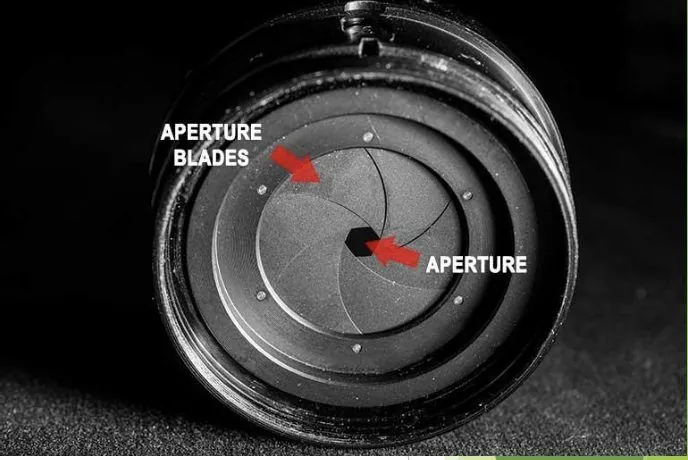
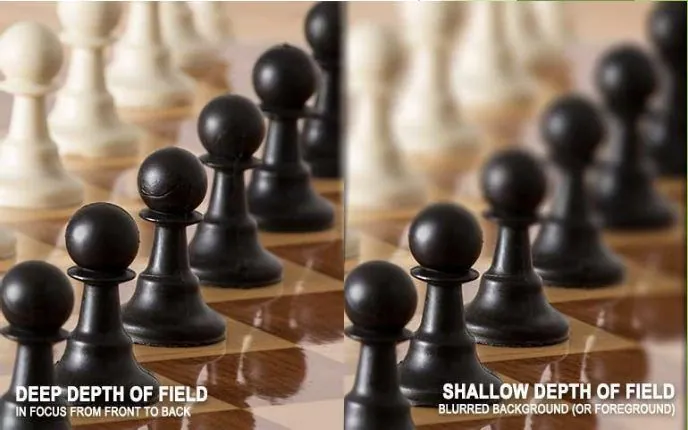
START HEREOpen your unit one-sheetPrint it or keep it open while you work.Open ↗Aperture is the opening inside the lens that light passes through on its way to the sensor, picture the iris of an eye opening and closing. A wide aperture (a small f-number, like f/2.8) lets in a lot of light and throws the background out of focus. A narrow aperture (a large f-number, like f/16) lets in less light but keeps almost everything sharp from front to back.
Left: the aperture blades inside a lens, opening and closing to control how much light gets through. Right: the same row of chess pieces at two different apertures, one where everything from front to back is sharp, and one where only the closest pieces stay in focus.
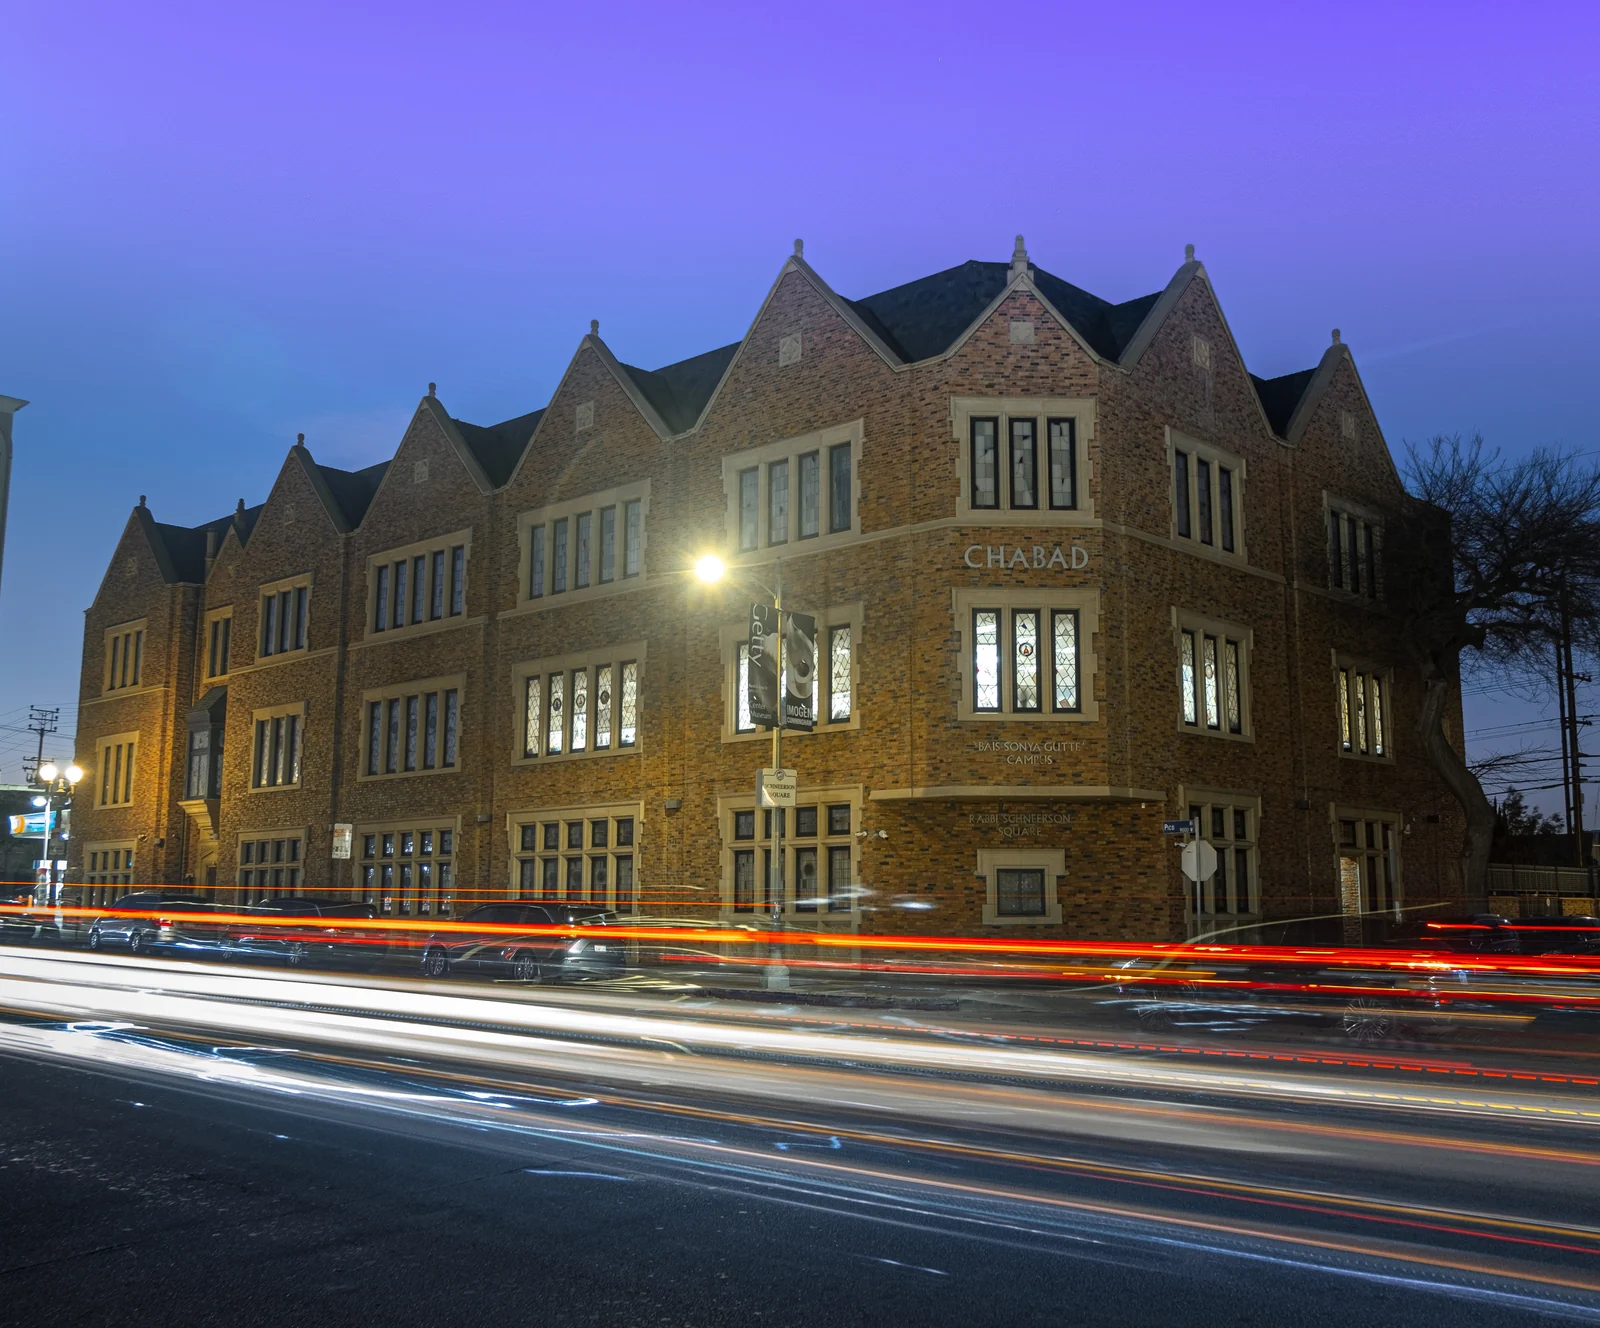
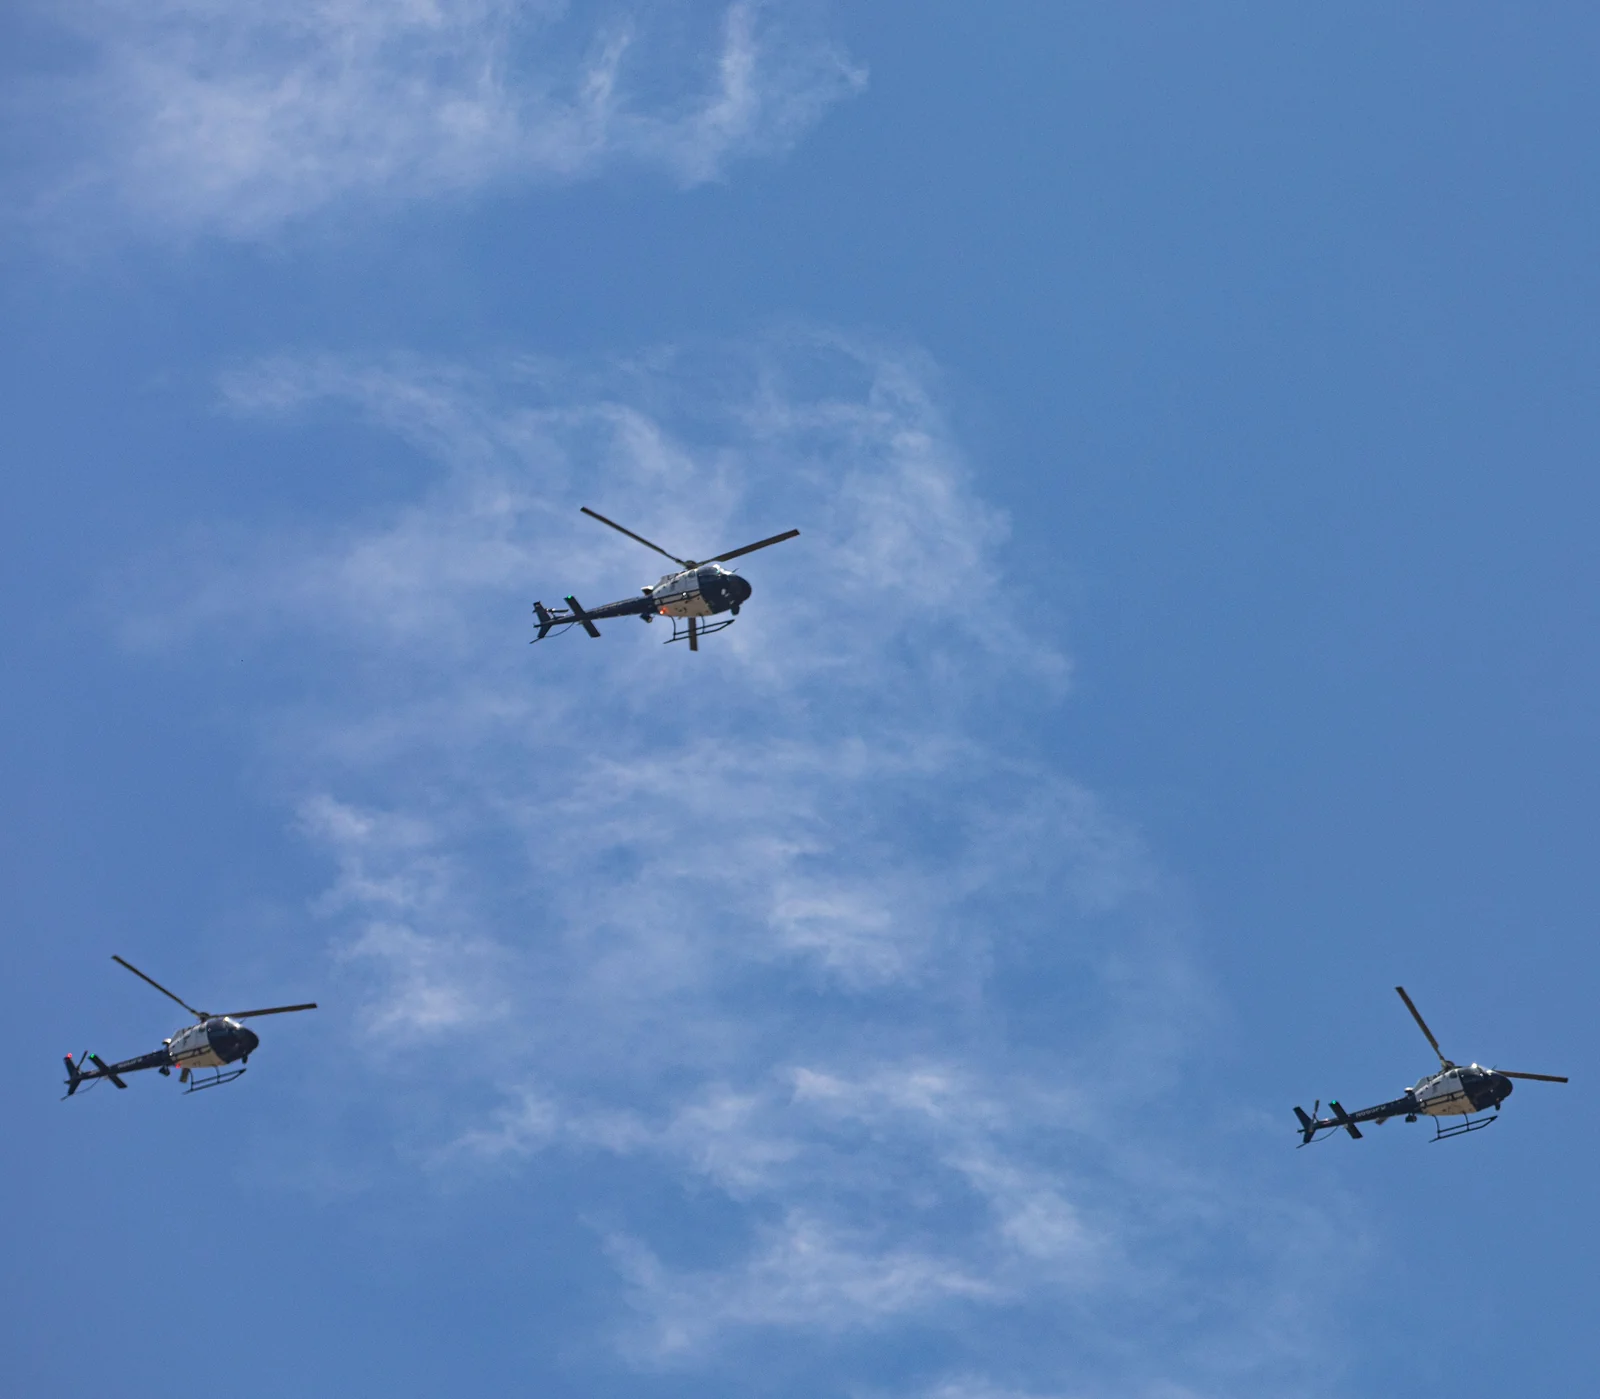
Shutter speed is simply how long the camera's sensor stays exposed to light, think of it like a blink. A fast blink (a fast shutter speed) freezes a moment in place, sharp and still. A slow blink (a slow shutter speed) lets whatever is moving smear across the frame while everything else stays put.
Left: an 8-second exposure turns passing headlights into glowing trails. Right: a fast shutter speed freezes a squadron of helicopters mid-flight, rotors and all.
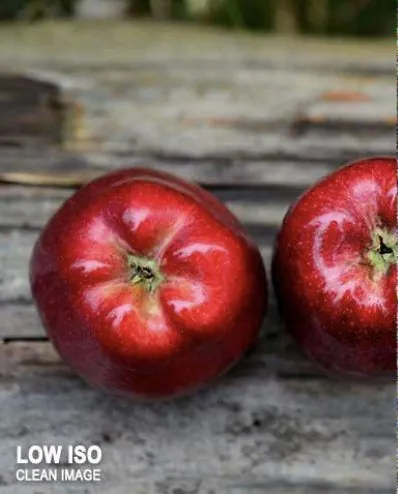
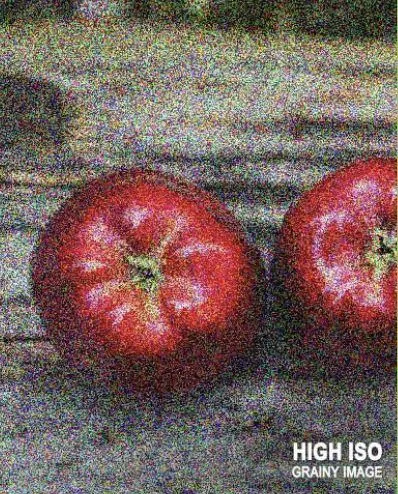
ISO measures how sensitive the sensor is to the light it's given. A low ISO (like 100) needs plenty of light but produces a clean, detailed image. Raise the ISO and the camera amplifies whatever light it does have, useful in dim rooms or at night, but the trade-off is grain, the speckled texture that shows up once the sensor's signal gets pushed past what the available light can cleanly support.
The same two apples at a low ISO (clean, almost no grain) and a high ISO (visibly grainy, especially in the shadows).
Balancing All Three
Aperture and shutter speed both control how much light reaches the sensor; ISO controls how sensitive the sensor is to that light once it arrives. A kitchen faucet is a useful way to picture it: aperture is how far the tap is open, the light itself is the water, and shutter speed is how long you let it run into the cup. Open the tap wider and you can fill the cup faster, or leave it running for less time. Close the tap and you need more time to fill the same cup. ISO works differently: it doesn't change how much water flows, it changes how sensitive the cup is to whatever water reaches it, useful once you've already opened the tap all the way and run it as long as you reasonably can.
Three ways to reach a similar exposure, a wider aperture (tap) needs less time (shutter speed) to fill the same cup.

Guidelines, Not Rules
A balanced exposure, not too dark, not too bright, is the right target most of the time, especially while you're still learning how the three settings interact. But it isn't always the goal. Photographers deliberately underexpose a scene to turn a subject into a silhouette, or let a bright window blow out entirely to keep the focus on what's in the foreground. Once you understand what a balanced exposure looks like and how to get there, you can start breaking from it on purpose.
A deliberately underexposed sunset shot turns the subject into a graphic silhouette against the sky, exposure used for effect, not accuracy.

This week's Weekly Mission
Weekly Mission 02: Exposure in Sun and Shade. Same subject, same framing, three brightness levels, once in sun and once in shade. Shot on campus today, Week 6, Monday. Edit and hand in Week 6, Tuesday, due 9:00 pm.