Edit one RAW photo part by part with four masks. Practice, not graded.
Practice | Ungraded | Week 8, Monday
Local Adjustments
One photo, edited part by part with four masks, into one balanced edit.
START HEREOpen your one-sheetPrint it or keep it open while you work.Open ↗1
RAW file, the cows
4
masks
0
points: this is practice
When: In class, Week 8, Monday. After the break, use masks on your Weekly Missions.
The goal
The edit helps the photo say what it already wants to say. Nobody can see where a mask starts.
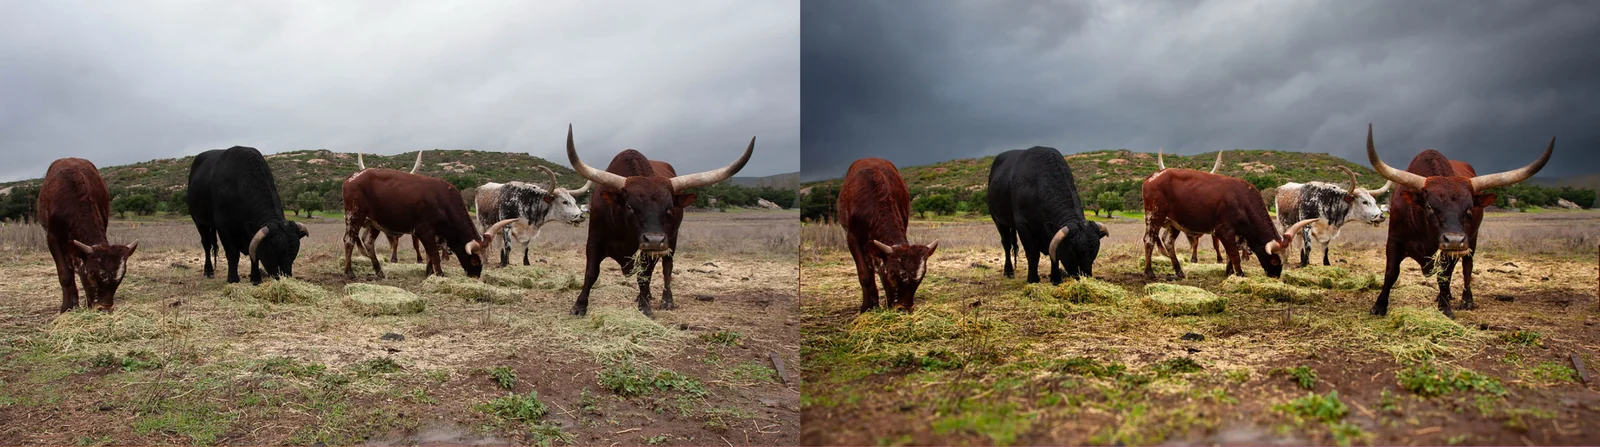
Before and after: the unedited RAW photo on the left, the finished local-adjustment edit on the right
Step by step
One small step at a time.
01
Import, light preset
Download the RAW and import it.
• One subtle preset as a starting point.
02
Sky and foreground
Two masks.
• Select Sky: lower the highlights, add a little contrast.
• Brush the foreground: lift it gently.
Watch out: A sky that looks pasted on. Lower the mask amount until it blends.
03
Subject and one detail
Two more masks.
• Select Subject on the cows: a touch brighter.
• Object: one small detail.
• Name the masks: Sky, Field, Cows.
Watch out: Masks spilling over. Turn on the overlay and erase the extra.
04
Clean up, export
Then compare before and after.
• Remove one distraction.
• Export a JPG named Cows_Edited.jpg and upload it here.
Watch out: Glowing cows. Brighten a little, not a lot.
Hand it in
One JPG, uploaded here at the end of class. Not graded. It shows me where you need help.
Check before you submit